
How to Prepare for a Roof Replacement in NJ: The 2026 Pre-Construction Checklist
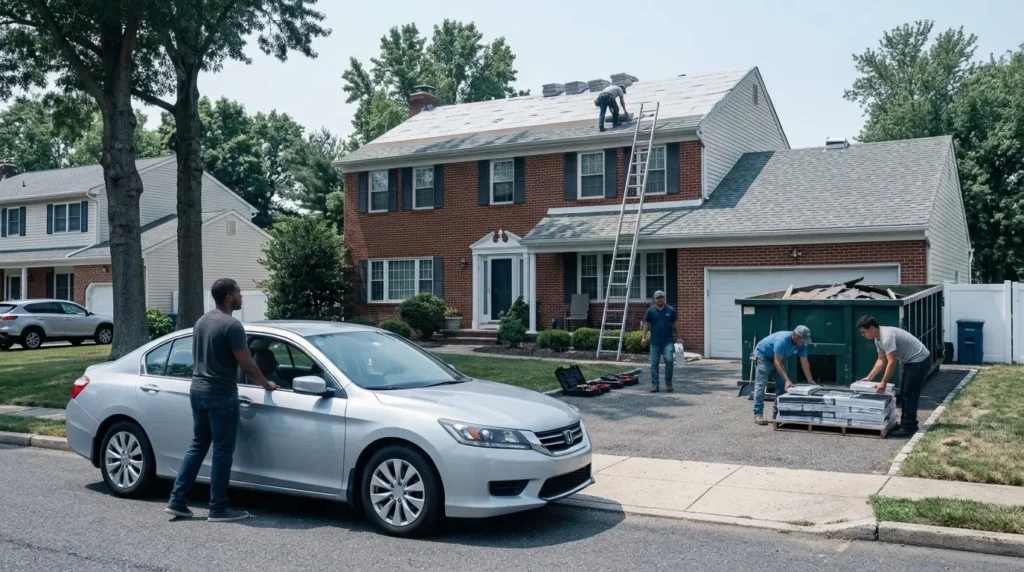
Knowing how to prepare for a roof replacement NJ homeowners can act on comes down to a short list. Confirm the contractor’s HIC registration and insurance are current (a standard one or two-family re-roof in NJ is ordinary maintenance and needs no permit). Move vehicles out of the driveway, take down wall hangings and attic-stored fragile items (vibration knocks them loose), clear the area around the house, secure pets indoors, and notify neighbors. Confirm the crew’s access to power and a staging spot for the dumpster.
A roof replacement is one of the largest and loudest projects most NJ homeowners will ever schedule. Done right, it is three noisy days and a new roof. Done without preparation, it is a cracked driveway, a dented car, a flowerbed full of roofing nails, and a picture frame that fell off the wall and broke during tear-off.
The work itself is the contractor’s job. Getting your property and your household ready is yours, and the preparation takes about an afternoon. This checklist walks through every step: what to verify before you sign, how to protect the outside and inside of your home, what to expect on install day, and what to confirm after the crew leaves. The final section covers the additional steps community associations and HOA boards must complete, because a multi-building project carries approvals and logistics a single home does not.
If you have not chosen a contractor yet, do that first. This guide picks up after the contract is signed.
- Part 1: Before you sign, confirm the paperwork
- Part 2: The two weeks before install day
- Part 3: Protect the outside of your home
- Part 4: Protect the inside of your home
- Part 5: People, pets, and neighbors
- Part 6: What to expect on install day
- Part 7: After the crew leaves
- The homeowner pre-construction checklist
- Part 8: Additional steps for NJ community associations
Part 1: Before You Sign, Confirm the Paperwork
Most of what protects you happens on paper, before a single shingle is touched. Do not skip these confirmations because the contractor seems trustworthy. The paper is what you fall back on if anything goes wrong.
Know when a permit is and isn’t required. This is where many NJ homeowners are misinformed. In New Jersey, re-roofing a one or two-family home (tearing off and replacing the roof covering, including replacing damaged sheathing as part of the job) is classified as ordinary maintenance and does not require a building permit. A permit comes into play only for structural work, such as altering the roof framing or pitch, or for adding rooftop solar. Condominium, multi-family, and commercial buildings are different and do require construction permits (covered in Part 8). The framework is set by the NJ Uniform Construction Code, administered by the NJ Department of Community Affairs.
HIC registration is current. New Jersey law requires any contractor doing home improvement work over $500 to register with the Division of Consumer Affairs as a Home Improvement Contractor. The number belongs on your written estimate. Verify it at the NJ Division of Consumer Affairs HIC registry. The check takes 30 seconds.
Insurance certificates are in hand. Request a certificate of insurance showing general liability and current workers’ compensation before work starts, not the morning the crew arrives. If a worker is injured on your property and the contractor carries no workers’ comp, the exposure can land on your homeowner’s policy.
The contract spells out the scope. Your written agreement should name the shingle manufacturer, product line, and warranty tier; list tear-off and disposal separately; specify ice and water shield at eaves, valleys, and penetrations (NJ code minimum); name the underlayment and flashing materials; and state the workmanship warranty terms. A single lump-sum number with no breakdown is not a scope.
The payment schedule is reasonable. A deposit at signing is standard. Full payment before any work begins is a fraud risk. The NJ norm is a deposit plus the balance due after the final walkthrough.
The change-order process is documented. Deck damage is the most common surprise. When tear-off exposes soft or rotted sheathing, the contractor should have a per-sheet rate disclosed up front and require your written authorization before replacing it. No verbal add-ons.
Part 2: The Two Weeks Before Install Day
Confirm the date and the weather plan. NJ weather drives roofing schedules. Reputable contractors reschedule when rain is in the forecast because wet decking cannot be covered. Ask how the contractor handles a weather delay and how you will be notified. A crew willing to lay shingles over wet decking is a crew to worry about.
Plan where materials and the dumpster will go. Shingles, underlayment, and a dumpster or dump trailer need a staging spot, usually the driveway or a flat section of yard close to the house. Walk the property with the contractor or describe your layout so they know where to place everything. If the dumpster will sit on the street, the town may require a separate street-placement permit; confirm who handles it.
Check for overhead obstructions. Low utility lines, tall tree limbs over the roof, and tight side-yard access all affect how the crew works. Flag anything unusual before the truck shows up.
Ask who will be on site. Confirm the name of the foreman or crew lead who will run your job, and that the same person is there through completion. You want one accountable point of contact, not a different unnamed crew than the salesperson you met.
Part 3: Protect the Outside of Your Home
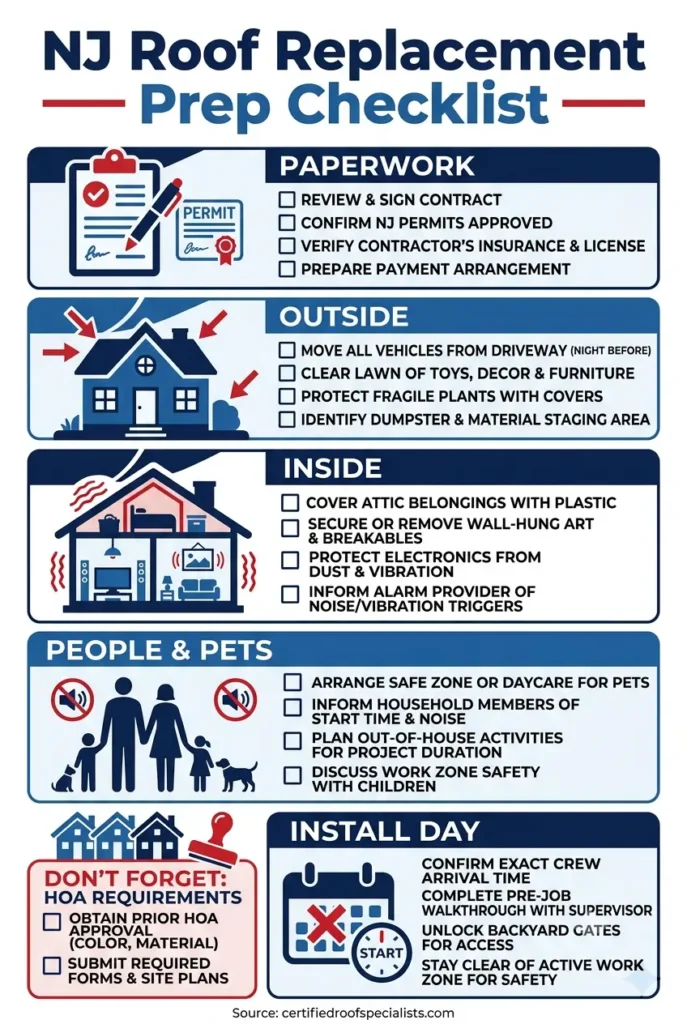
Tear-off is a controlled demolition happening above your head. Debris, nails, and shingle granules come down. Vibration travels through the structure. The following steps take an afternoon and prevent the most common damage claims.
Move every vehicle out of the driveway and away from the house. Park on the street or down the block. Crews need driveway access for staging and the dumpster, and falling debris dents hoods and cracks windshields. This is the single most important outdoor step.
Relocate anything you can move away from the perimeter. Patio furniture, grills, planters, garden ornaments, kids’ play equipment, and trash cans should move at least 10 to 15 feet from the house, or into the garage. Anything within the drip line of the roof is in the fall zone.
Protect what you cannot move. Central AC condensers, pool equipment, permanent landscape features, and delicate plantings against the foundation should be covered with tarps or plywood. A good crew brings protection, but point out anything fragile so nothing is missed.
Cover the pool. If you have an in-ground or above-ground pool near the roofline, cover it. Roofing debris and nails in a pool are a genuine cleanup and liability problem.
Take down the satellite dish if it is mounted on the roof. Coordinate with the contractor. A dish often has to come off for the work and be remounted and realigned after. Know in advance whether the roofer or your provider handles re-aiming.
Clear the side yards and access paths. The crew will set ladders and move around the full perimeter. Open gates, unlock side yards, and move anything blocking a clean walking path around the house.
Part 4: Protect the Inside of Your Home
The part homeowners forget: the inside of the house feels the job too. Hammering and tear-off send vibration through the framing, and dust drifts down from the attic.
Take down wall hangings, mirrors, and shelves on upper floors. Vibration walks picture frames off their hooks and rattles loosely mounted shelves. Anything fragile or valuable on a wall, especially on the top floor, should come down for the duration.
Remove or secure ceiling fixtures that wobble. Chandeliers and hanging light fixtures on the top floor can swing during heavy tear-off. If something is already loose, secure it or remove it.
Clear and cover items stored in the attic. This is the most overlooked step. Tear-off dislodges decades of dust and debris in the attic, and it rains down on whatever is stored up there. Move boxes away from the area being worked, or cover everything with drop cloths or plastic sheeting. Expect fine dust regardless.
Cover belongings in the top-floor rooms and garage. A light layer of dust can sift through the ceiling during the loudest phases. Drape sheets over beds, electronics, and anything in the garage directly under the roof deck.
Plan around the noise. A roof replacement is loud, all day, for one to three days. If you work from home, plan to work elsewhere. If you have an infant, a night-shift worker sleeping during the day, a pet that panics at noise, or anyone sensitive to sustained sound, make arrangements for those days.
Part 5: People, Pets, and Neighbors
Secure pets indoors, away from the work. Dogs and cats are stressed by the noise and at risk from falling debris and open gates. Keep them inside in an interior room, or board them for the day if they panic. Make sure gates stay closed so a pet cannot slip out while the crew moves in and out.
Keep children inside and away from the perimeter. The yard around the house is an active debris zone during tear-off. Kids should stay indoors or off the property until cleanup is done.
Notify your neighbors. A courtesy heads-up a few days ahead goes a long way, especially in tight NJ neighborhoods and townhome rows. Tell adjacent neighbors the dates so they can move their own cars and plan around the noise. In attached or zero-lot-line housing, the crew may need brief access to a neighbor’s side yard for ladder placement; arrange that in advance.
Confirm crew access to power and a restroom plan. Crews run compressors and tools off exterior outlets. Make sure an outdoor outlet is accessible, or point out where one is. For multi-day jobs, ask the contractor about their restroom arrangement so it is settled before day one.
Part 6: What to Expect on Install Day
Knowing the rhythm of the day removes most of the anxiety.
Early start. Crews typically arrive between 6:30 and 8:00 AM to maximize daylight, especially in summer heat. Expect trucks, ladders, and staging first thing.
Tear-off first, and it is the loudest phase. The old roof comes off down to the deck. This is the noisiest, dustiest stretch. The crew inspects the exposed decking for soft spots and rot at this point, which is when a change order would come up if damage is found.
Decking, underlayment, then shingles. Any bad sheathing is replaced (with your authorization), then ice and water shield and underlayment go down, then flashing and shingles. A good crew keeps the roof dried-in so an afternoon shower does not soak the deck.
Cleanup happens daily, not just at the end. Ask whether the crew runs a magnetic nail sweep at the end of each work day. Nails end up in grass, beds, and the driveway, and a daily sweep keeps them from sitting in your yard for days.
You do not need to be home the whole time, but be reachable. Decisions about deck damage or unexpected conditions move faster when the contractor can reach you by phone.
Part 7: After the Crew Leaves
Walk the roof line from the ground with the foreman. Do a final walkthrough. Confirm the work matches the contract scope, ridge caps and flashing look clean, and the job is complete.
Verify the cleanup. Check the yard, beds, driveway, and gutters for debris and nails. Ask the crew to run the magnetic sweep again if you find nails. Walk the perimeter yourself over the next few days; stray nails surface for a week or two.
Collect your documentation. You should receive: the manufacturer warranty certificate (registered in your name), the contractor’s written workmanship warranty, photos of the completed work, and, if any structural work required a permit, the municipal final-inspection sign-off. Tie your final payment to receiving this package.
Register the warranty. Confirm the manufacturer warranty is registered to you. On premium tiers (GAF Golden Pledge, CertainTeed SureStart PLUS) the registration is what makes the long-term coverage real.
Keep everything with your home records. At resale, a documented roof replacement with transferable warranties is a selling point. The buyer’s attorney and inspector will ask.
The Homeowner Pre-Construction Checklist
How to prepare for a roof replacement NJ homeowners can print and work through
Print this and work through it the day before.
- HIC registration verified at njconsumeraffairs.gov
- Certificate of insurance (general liability + workers’ comp) in hand
- Written scope with materials, ice and water shield, and warranty terms
- Reasonable payment schedule (deposit + balance after walkthrough)
- Change-order process and per-sheet deck-repair rate documented
- Permit only if the job is structural or adds solar (a standard re-roof needs none)
- All vehicles moved off the driveway and away from the house
- Patio furniture, grills, planters, toys moved 10 to 15 feet out or into the garage
- AC condenser, pool equipment, and delicate plantings covered
- Pool covered
- Roof-mounted satellite dish coordinated
- Gates open, side-yard access clear, dumpster spot identified
- Wall hangings, mirrors, and shelves down on upper floors
- Wobbly ceiling fixtures secured or removed
- Attic items moved or covered
- Top-floor and garage belongings covered against dust
- Noise plan for work-from-home, infants, pets, and night-shift sleepers
- Pets secured indoors
- Children kept inside during tear-off
- Neighbors notified of dates
- Crew access to an exterior outlet confirmed
Start with a written scope you can prepare around
A free CRS inspection across Monmouth, Ocean, Middlesex, Somerset, and Union Counties gives you a written report with condition ratings and an honest scope, so your prep checklist matches the actual job, with no pressure and no obligation.
Part 8: Additional Steps for NJ Community Associations and HOA Boards
A roof replacement on a townhome, condo, or 55-plus community is the same physical work multiplied across many buildings, wrapped in a governance and approval process a single homeowner never touches. If you are a board member or property manager, the homeowner checklist above still applies to each building. These steps come first.
One key difference from a single-family home: roofing work on condominium, multi-family, and commercial buildings is not classified as ordinary maintenance. It requires construction permits and municipal inspections under the NJ Uniform Construction Code. Confirm your contractor pulls the required permits per building and budgets for the inspection process.
Secure board authorization in the proper form. Most NJ community associations require board approval, and often a formal recorded vote, before any major capital expenditure. Check your governing documents for the dollar threshold that triggers a vote, owner notification, or a special meeting. Authorizing the roof replacement project incorrectly can expose individual board members and invite owner challenges.
Start from a professional condition assessment, not a sales quote. Commission a written, per-building condition assessment with ratings, documented deficiencies, photos, and a prioritization that distinguishes emergency replacements from buildings with years of life left. This becomes the single scope every bidder works from. Without it, each contractor bids a different scope and the proposals cannot be compared.
Get at least three comparable bids. All three should price the identical written scope. Bids that deviate must explain the deviation in writing. Comparing on price alone, without a standardized scope, is the most common HOA bidding error.
Require the association as an additional insured. The certificate of insurance must name the association specifically, with general liability of $2 million aggregate as the multi-unit standard, workers’ comp, and a commercial umbrella. Confirm it before the contract is signed, not the day work starts.
Align the roof replacement project with the reserve study and funding plan. New Jersey now requires most condominiums, cooperatives, and larger planned developments to maintain a reserve study and fund reserves on a defined schedule. Roofing is typically the single largest line item in that study. Before committing, confirm the roof replacement project fits the funding plan, and feed the contractor’s condition assessment back to your reserve specialist.
Clear architectural and color approval. Many associations require that roofing material, color, and profile match a community standard. Confirm the selection is approved before ordering material so a whole building does not get installed in the wrong color.
Plan resident communication and logistics. Residents need advance notice of dates, parking restrictions, staging locations, and noise. In dense townhome rows and 55-plus communities, staging a dumpster and material for one building affects the neighbors on either side. Map parking and access per building. Designate a single project contact residents can reach so questions do not flood the management office.
Confirm emergency repair authorization. Designate, in the governing documents or by board resolution, who can authorize urgent repairs (active water intrusion, structural risk) without convening a full vote. You do not want a leak waiting on a quarterly meeting.
Sequence the phases. If the community cannot fund a community-wide replacement in one cycle, phase it: buildings with active leaks and failed flashing first, buildings with seven to ten years of life later. Build 3 to 5 percent annual cost escalation into the deferred phases. The broader framework is in the NJ community association roofing guide.
Community Association Pre-Construction Checklist
- Board authorization secured in the form your governing documents require
- Per-building professional condition assessment completed
- At least three bids on an identical written scope
- Certificate of insurance naming the association as additional insured
- Construction permits pulled per building (multi-unit and commercial require them)
- Project confirmed against the reserve study and funding plan
- Architectural and color approval cleared
- Resident notification, parking, and staging plan distributed
- Emergency repair authorization designated
- Phase sequence set, with cost escalation built into deferred phases
- Single project contact assigned for residents and the management office
NJ active-adult communities with attached units (Crestwood Village in Manchester, Holiday City in Toms River, Greenbriar I and II in Brick, Heritage Bay in Barnegat) also carry flat or low-slope sections that need modified bitumen or TPO, not asphalt. Confirm any contractor bidding the roof replacement project handles both systems under one scope.
How to Prepare for a Roof Replacement NJ: Start With a Free Inspection
The cleanest roof replacement starts weeks before install day, with a written inspection report and a clear scope you can prepare around. Certified Roofing Specialists Inc. provides a free inspection to homeowners and a per-building condition assessment to community associations across Monmouth, Ocean, Middlesex, Somerset, and Union Counties. You get a written report with condition ratings and an honest scope.
Roof replacement service · Community association roofing · Roof replacement cost in NJ · NJ community association roofing · Best roofing shingles NJ · Find your CRS town
Last updated July 6, 2026. Written by the Certified Roofing Specialists Inc. team, licensed New Jersey roofing contractors serving Monmouth, Ocean, Middlesex, Somerset, and Union Counties.
Frequently asked questions
Do I need a permit to replace my roof in NJ?
For a one or two-family home, a standard re-roof is classified as ordinary maintenance in New Jersey and does not require a building permit. A permit is required only for structural work, such as altering the roof framing or pitch, or adding rooftop solar. Condominium, multi-family, and commercial buildings are different: those projects do require construction permits and inspections.
How long does a roof replacement take in NJ?
Most single-family NJ roof replacements take one to three days for the field work, weather permitting. A simple ranch can finish in a day; a large or steep colonial with multiple valleys and copper flashing runs two to three days. Rain pauses the job because wet decking cannot be covered. Community association phases run longer per building.
What does an HOA need to approve before a roof replacement in NJ?
Board authorization (often a formal vote), a written scope from a professional condition assessment, at least three comparable bids, a certificate of insurance naming the association as additional insured, and confirmation the project aligns with the reserve study and funding plan. Architectural or color approval, the required construction permits per building, and resident notification are usually required before work starts.
-

How NJ HOAs and Condos Budget a Roof Replacement: The 2026 Reserve Study Guide
How NJ HOAs budget for roof replacement comes down to the reserve study: it estimates each roof’s remaining…
-
Storm Damage Roof Inspection NJ: The First 48 Hours (2026 Playbook)
After a major storm, a storm damage roof inspection NJ follows one order: stay off the roof, document…
-
How to Choose a NJ Roofing Contractor: 7 Intelligent Questions to Ask in 2026
How to choose a NJ roofing contractor with confidence: verify the contractor’s New Jersey Home Improvement Contractor (HIC)…